

QuickBooks Error 5 is a technical error which generally appears during the installation of QuickBooks POS. This error may occur while performing certain functions in QuickBooks, or when opening the company file in the multi-user setup.
This article encapsulated the various causes leading to QuickBooks Error 5, and also provides a detailed insight into the different methods that can be resorted to for fixing QuickBooks Unexpected Error 5. So, read this article till the end.
What causes QuickBooks Unexpected Error 5?
The various triggers behind QuickBooks Error Code 5 are:
- Interruptions in the network connection between the company file and the workstation.
- Damaged company or network data files.
- Insufficient user account permissions for accessing the company file in the Multi-User mode.
- Outdated QuickBooks Desktop program.
- Windows registry related issue could also contribute to this QuickBooks error.
Procedure for exterminating QuickBooks Error Message 5
Before kick-starting the troubleshooting procedure, users should go for updating of QuickBooks, the steps for which are given below:
- Start off by running QuickBooks as an admin by right-clicking on its .exe icon and then clicking on Run as Admin.
- Follow up by typing in the login credentials and hit the Enter key to access the accounting program.
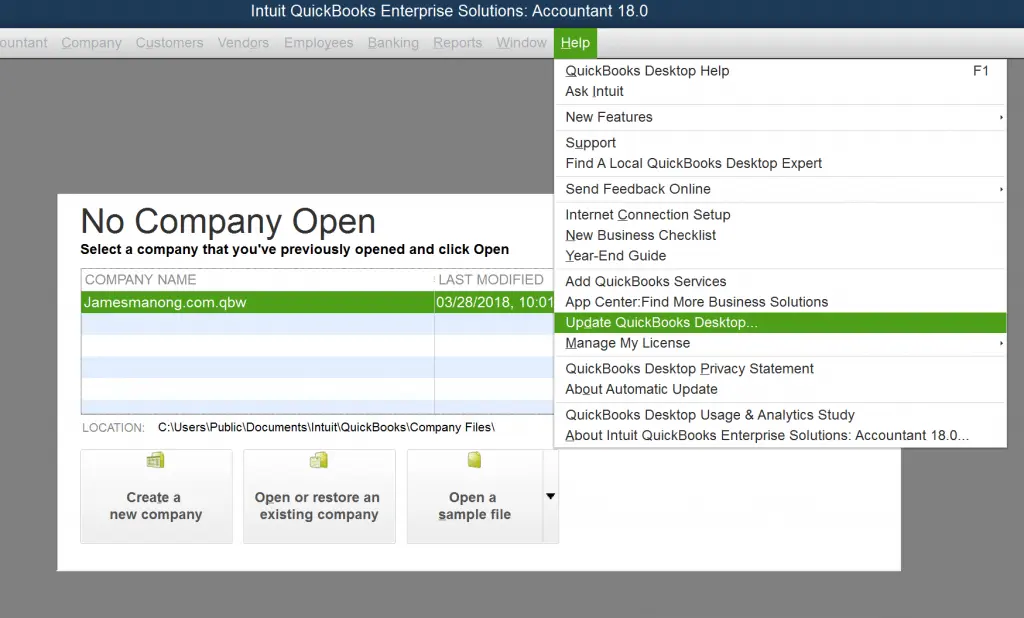
- Subsequently, proceed to the Help tab and following that, tap on the Update QuickBooks Desktop
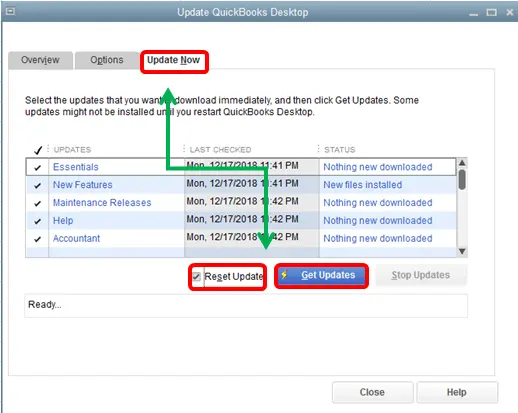
- Soon after, proceed to the Update Now tab and thereafter, choose all the important updates to download.
- To initiate the process of downloading the updates, the user should click on the Get Updates option.
- After that, restart QuickBooks and follow up by hitting on the Install Now tab.
- Upon updating QuickBooks, users can then resort to the following fixes for annihilating QuickBooks Unexpected Error 5.
Fix 1: Creation of a new Company File User
- Start off by launching QuickBooks Desktop. From there, head to the Company tab, and therein, hit on Users.
- Follow up by clicking on the option to Set up Users and Roles.
- Now, make a move to the User List and opt for the user.
- After that, hit on the Delete option.
- Once the use is deleted, the following step to be followed is the recreation of a new User, the steps for which are illustrated below:
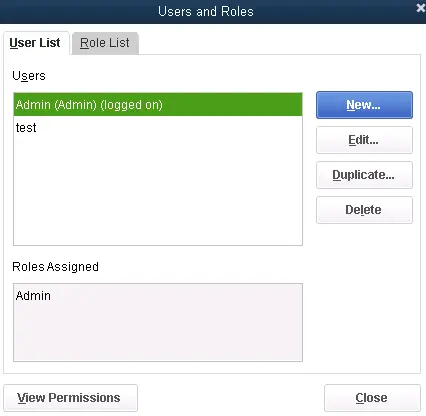
- Advance to the Users and Roles section and then click on New.
- Herein, type in the username corresponding to this new User and also type in the password.
- Follow up by clicking on Ok to finish up with the creation of the new user.
Fix 2: Repairing the company file using QuickBooks File Doctor
- First of all, navigate the Intuit website, and follow up with the downloading of the QuickBooks Tool Hub.
![]()
- Now, download the QuickBooks file doctor tool. Once the tool is installed, head for the Company file issues tab, and follow up by clicking on the Browse tab.
- Choose the Company file. Afterwards, hit on the tab to check your File and after that, hit on Continue.
- The tool will diagnose the file for any issue and will fix the same instantly.