

When attempting to log in to a bank's website through QuickBooks, users may encounter QuickBooks Error 324. This error can occur due to various technical issues or routine maintenance being performed on the bank's website. In this blog post, we will discuss QuickBooks Error 324 and provide users with easy and effective methods to resolve it.
Causes of QuickBooks Error 324
Some of the noteworthy causes of this error are:
- Incomplete installation of QuickBooks.
- Unwarranted changes made to the account name.
- User-deleted essential QuickBooks files.
- Damaged or missing QuickBooks keys in the Windows registry.
- Virus attack.
Methods to Resolve QuickBooks Error 324
The multiple strategies for fixing this QuickBooks error 324 are discussed in the form of various methods in this section. Follow up with the steps in the same orderly sequence.
Method 1: Use the System File Checker
- Initiate by pressing Win + R keys. This short key will open the Run window.
- Now, type "cmd" in the Run window and follow up by hitting the Enter key.
- The Command prompt window with a black screen will appear.
- In the command prompt, type "SFC" and follow up by pressing the Enter key.
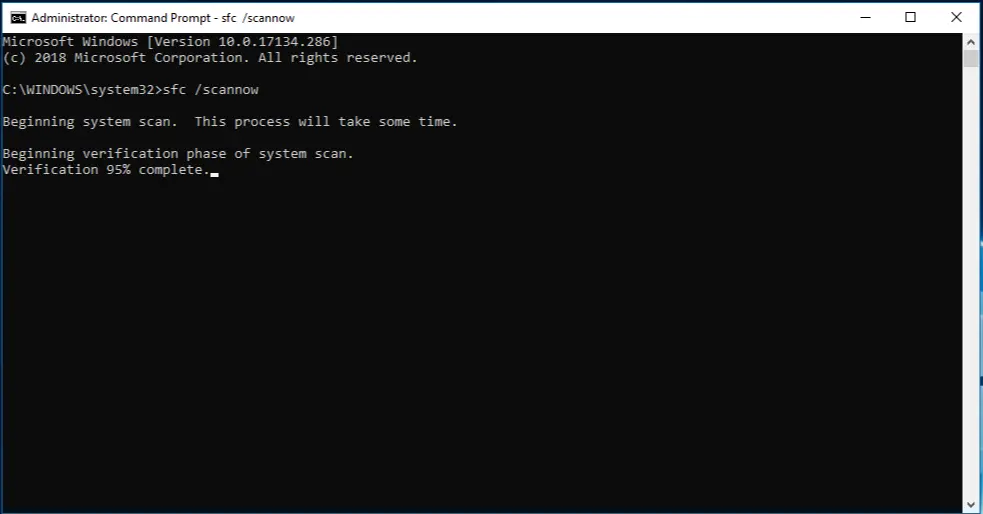
- After the scan is complete, try accessing the bank's website through QuickBooks to check if Error 324 got fixed.
Method 2: Update Transactions
This method requires updating the transactions in QuickBooks, the procedure for which is given as under:
- Open the web browser and navigate to QuickBooks Online.
- Soon after, type in the correct login credentials and login to the account.
- When successfully logged into the account, hit on the "Transactions" tab.
- After that, proceed by tapping on the “Update" option.
- This will start the update process. Once the update is complete, verify if Error 324 is resolved.
- If the error still keeps persisting, head to the Transaction or Banking tab.
- After that, opt for the "Check connections" option to ensure a seamless connection.
For QuickBooks Self-Employed, perform the below given steps to check connections:
- Run QuickBooks Self-Employed and proceed ahead to log in to the account.
- Advance to the "Bank accounts" option and hit on the "Refresh all" option.
- Navigate to the "Transactions" tab.
- Click on the "Check connections" option.