
how to scan documents on android mobile : Gone are the days when scanning documents required bulky scanners or visits to the nearest office supply store. With the advancements in technology, you can now easily scan documents using your Android mobile device. Whether you need to digitize receipts, capture important paperwork, or create PDF files, this article will provide you with a step-by-step guide on how to scan documents on your Android mobile. Get ready to unlock the power of your smartphone and simplify your document scanning needs.
Are you tired of dealing with stacks of paper documents and longing for a more efficient way to digitize them? Look no further! Your Android mobile device can serve as a handy scanner that fits in your pocket. Let's explore the step-by-step process to scan documents on Android.
Step 1: Choose a Document Scanning App:
- Open the Google Play Store on your Android device.
- Search for "document scanning apps" or "scanner apps" and select a reputable app from the search results.
- Install the app of your choice.
Step 2: Launch the Document Scanning App:
- Locate the newly installed document scanning app on your device and tap to open it.
- Grant the necessary permissions requested by the app, such as accessing the camera and storage.
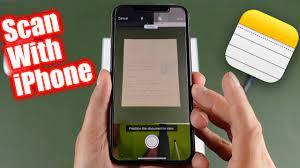
Step 3: Position the Document:
- Place the document you want to scan on a flat surface with sufficient lighting.
- Align the document within the viewfinder of the document scanning app.
Step 4: Capture the Document:
- Tap the capture button within the app, usually represented by a camera icon.
- Ensure that the entire document is within the frame and remains steady.
- The app will automatically capture the image when it detects the document is properly positioned.
Step 5: Adjust Scanning Settings (Optional):
- Some document scanning apps offer additional settings to enhance the scanned document.
- Explore options like adjusting brightness, contrast, or color saturation to improve the quality of the scan.
Step 6: Review and Save the Scanned Document:
- After capturing the document, the app will display a preview of the scanned image.
- Review the scan to ensure it is clear and legible.
- If satisfied, tap the "Save" or "Done" button to save the scanned document.
Step 7: Edit or Enhance the Scanned Document (Optional):
- Depending on the scanning app you choose, you may have the option to edit or enhance the scanned document further.
- Explore features like cropping, rotating, or applying filters to optimize the scanned document.
Step 8: Export or Share the Scanned Document:
- Once you have saved and edited the scanned document, you can export it in various formats, such as PDF or image files.
- Look for the sharing or export options within the app to choose your desired format.
- You can save the scanned document to your device's gallery, send it via email, upload it to cloud storage, or share it through other apps.
how to scan documents on iPhone : With the availability of powerful document scanning apps on Android devices, scanning documents has become incredibly convenient and accessible. By following the step-by-step guide provided in this article, you can transform your Android mobile device into a portable scanner, allowing you to digitize documents with ease. Embrace the convenience and efficiency of mobile scanning and enjoy a clutter-free and organized approach to document management. Say goodbye to paper piles and hello to the simplicity of scanning documents on your Android mobile device!